
A successful installation starts long before you pick up a screwdriver. Getting an integrated fridge freezer to fit perfectly is all about smart prep work. Taking the time now to double-check every measurement and understand your existing setup is the single most important thing you can do for a smooth, headache-free installation day.
What You Need to Know Before You Begin

Before you even slice open the box, a few critical checks will save you from some serious frustration down the line. Integrated appliances are built for precision; they're designed to sit completely flush with your cabinetry, which means there's absolutely no wiggle room for mistakes. Nail these details from the outset, and you're on your way to a professional finish.
The trend for these sleek, hidden appliances is bigger than ever, riding the wave of the UK's home renovation boom. In fact, the UK kitchen appliance market is set to be worth nearly £3 billion by 2025, with built-in refrigeration seeing a huge surge in popularity. That means thousands of people are tackling this exact job every year, making good preparation more vital than ever.
Mastering the Measurements
Your tape measure is your most valuable tool at this stage. Don’t just measure the front opening of the cabinet—you need the full internal depth, width, and height. I always recommend consulting a detailed appliance sizing guide before you buy, just to be certain your new model will slot right in.
And don't forget about breathing room. An integrated fridge freezer works hard and generates heat, so it needs proper airflow to keep it running efficiently. Check the manufacturer's specs, but as a rule of thumb, you'll need:
- A 50mm (2-inch) gap at the back to let air circulate.
- A clear air channel running from the floor right up to the top of the unit.
- Ventilation grilles—one in the plinth and another above the appliance—each offering at least 200cm² of clear airflow.
Understanding Your Hinge System
This is a classic rookie error: buying an appliance with the wrong hinge type. Your kitchen cabinets will use one of two systems, and your new fridge freezer must have the same one.
- Sliding Hinge: This is where the cabinet door is attached to the appliance door with a set of runners. Each door has its own hinges, and as you open it, one simply slides along the other.
- Fixed Hinge (Door-on-Door): With this system, the cabinet door is bolted directly onto the appliance door. They become one solid unit, opening together.
Expert Tip: The easiest way to check is to look at your old unit. Open the door and see how the kitchen panel is connected to the appliance itself. That simple observation tells you exactly what hinge system you need to shop for.
Checking Your Power Source
Lastly, take a good look at your power socket. It absolutely cannot be directly behind the appliance, where you'd have to pull the whole thing out to reach it. The ideal spot is in an adjacent cabinet, which makes it easy to switch the power off for cleaning or in an emergency.
If your current socket is in the wrong place, you'll need to get an electrician to move it before you even think about starting the installation.
Your Pre-Installation Checklist
To make things easier, use this table to keep track of all the essential checks. It's a simple way to gather all the information you need in one place before you begin.
| Check or Measurement | Key Details to Verify | Your Notes |
|---|---|---|
| Cabinet Height | Measure the internal height from the base to the top shelf or panel. | |
| Cabinet Width | Measure the internal width at the front and back. Use the smaller number. | |
| Cabinet Depth | Measure from the front edge to the back wall. Remember to subtract 50mm for ventilation. | |
| Ventilation (Plinth) | Is there a plinth vent? Does it provide at least 200cm² of airflow? | |
| Ventilation (Top) | Is there a top vent or clear channel? Does it provide at least 200cm² of airflow? | |
| Hinge System | Is it a Sliding or Fixed (Door-on-Door) hinge? | |
| Power Socket Location | Is the socket accessible from an adjacent cabinet, not directly behind the unit? |
Having these details written down will not only help you buy the right appliance but will also make the actual fitting process much more straightforward.
Getting Your Tools and the Space Ready
A successful installation really boils down to having the right gear and a clear space before you even think about unboxing the new appliance. Scrambling to find a screwdriver mid-job is a frustration nobody needs. You don't need a pro-level workshop, but a few essentials will make all the difference.
You'll definitely need a decent screwdriver set (with both Phillips and flathead options), a reliable tape measure, and a spirit level. I’d also strongly recommend a socket wrench set; it makes adjusting the levelling feet at the bottom of the fridge an absolute breeze. And trust me, a good torch or a headlamp is a lifesaver when you're trying to see what you're doing in the back of a dark cabinet.
Prepping Your Kitchen for Action
Once your tools are laid out, turn your attention to the kitchen itself. The first thing on the list is protecting your floor. You can't go wrong with a big, flattened cardboard box from the new appliance's packaging. If you've already recycled it, an old blanket or a dust sheet will do the job just fine, saving your floor from any accidental scratches.
Now, if you're replacing an old unit, it's time to get it out of the way. Make sure it's completely empty and, most importantly, unplugged from the mains. Fridge freezers are deceptively heavy and awkward, so this is absolutely a two-person job. For a full rundown on getting it out safely, our guide on how to move a fridge has some really practical, step-by-step tips.
With the old appliance gone, grab a damp cloth and some mild detergent and give the inside of the cabinet a proper clean. You'll want to get rid of any dust, crumbs, or old spills.
A clean, clear workspace isn't just about being tidy. It's about making sure your new fridge sits perfectly level and that its ventilation channels are completely clear right from the get-go. It's a small step that pays off in the long run.
Finally, just give the area one last look over. Can you easily reach the power socket? Are there any bits of skirting board or rogue wires that might get in the way? Taking a few minutes to get this prep work done right turns a daunting task into something much more manageable.
Getting Your New Integrated Fridge Freezer Installed
Right, you’ve done the prep work, and now for the main event. Fitting an integrated fridge freezer is all about being precise and patient. If you rush this part, you'll end up with wonky doors or an appliance that doesn't run properly. So, take a breath, and let's focus on getting each part of the installation spot on for that seamless, built-in look.
First things first, you need to get the new appliance into its housing. Guide it in slowly and carefully, making sure you don't trap any wires or pipes behind it. Don't try to force it; just get it roughly into position. Once it's in the cabinet, the most critical job is to get it perfectly level. This isn't just for looks—it’s essential for the doors to seal properly and for the cooling system to work efficiently.
This flowchart breaks down the essential prep before you even get to this point.
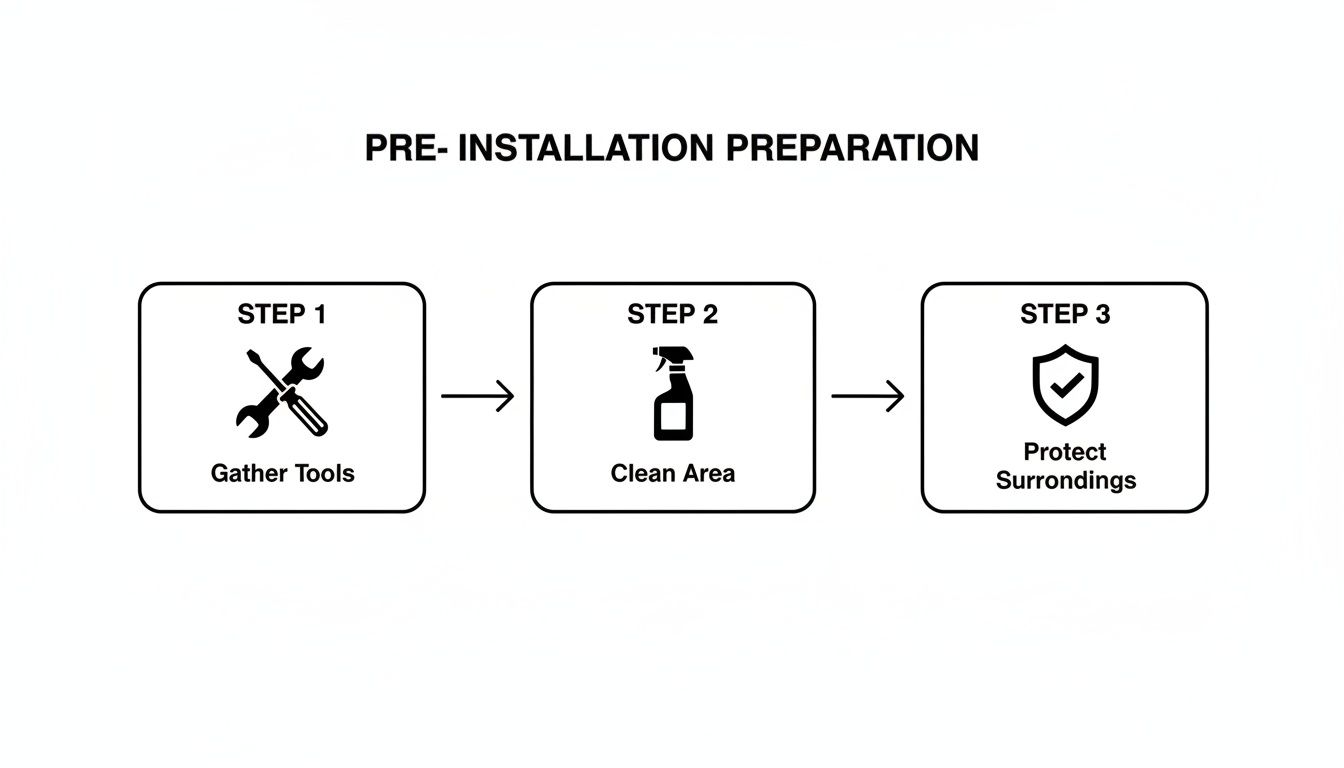
As you can see, having your tools handy, the area clean, and the floor protected makes the actual installation go much more smoothly.
Levelling and Securing the Appliance
Grab your spirit level and pop it on one of the shelves inside the fridge. Most integrated models have adjustable feet at the front, and some have rollers at the back. Using a spanner or the tool that came with the appliance, you can tweak these feet up or down. Keep adjusting them until the bubble on your spirit level sits dead centre, checking both side-to-side and front-to-back.
With the appliance perfectly level, it's time to fix it in place. You don't want it rocking or shifting every time you open the door. Your fitting kit should contain several mounting brackets. These are usually used to screw the top and bottom of the appliance directly to the cabinet frame. Fix them firmly, but don't tighten the screws all the way just yet.
A Pro Tip: Before you crank those screws down for the final time, open and close the appliance door a few times. Make sure it swings freely without catching on the cabinet frame. Once you're certain it has enough clearance, go ahead and tighten everything up.
Attaching the Cabinet Doors
This is the part that demands real attention to detail. It can make or break the final look. Your appliance will have one of two systems: sliding hinges or fixed hinges.
- Sliding Hinges: With this system, you attach a runner to the appliance door and a corresponding bracket to the inside of your cabinet door. When connected, the cabinet door glides along this runner as it opens and closes.
- Fixed Hinges (Door-on-Door): This is a more direct setup. You simply mount the cabinet door directly onto the hinges of the appliance door, creating one solid, connected unit.
The secret to a flawless finish is in the fine-tuning. Almost every hinge system has small adjustment screws that let you move the door up and down, left and right, and in and out. Make tiny adjustments to these screws until the gaps around your cabinet door are perfectly even and it sits flush with the neighbouring units. If you're not familiar with how kitchen units fit together, this guidance on kitchen cabinet installation offers some great background info.
Final Touches and Finishing Trims
Once the doors are perfectly aligned, you’re on the home stretch. Now it's about adding those last few bits that complete the look and ensure everything works correctly.
You’ll need to fit the ventilation grille into the kitchen plinth at the base of the unit. Don't skip this—it's the main air intake for the cooling system and it has to be kept clear.
Your fitting kit might also include some trim strips to cover any small gaps between the appliance and the cabinet. These usually just clip or stick into place. This final stage can be a bit fiddly, and if you find furniture assembly a nightmare, our team in Bristol offers expert furniture fitting services to get it done right.
Getting these details right isn't just about aesthetics; it contributes directly to the appliance’s efficiency. Modern fridge freezers are designed to be incredibly energy-efficient, but only if they're installed correctly. With the new energy labelling system introduced around 2021, upgrading from an old unit can lead to real savings on your bills. In fact, a new integrated model could save you around £10–£60 annually compared to an older, less efficient one.
Time to Power Up and Run Your Final Checks
You’ve done the heavy lifting, and your integrated fridge freezer is now nestled snugly in its cabinet. But hold off on that food shop for just a little while longer. These last few steps are absolutely vital to make sure your new appliance runs smoothly for years to come.
First things first, plug it in and switch it on at the socket. Don't be alarmed if you hear a low hum or even some gurgling sounds as it kicks into gear. That’s perfectly normal – it's just the sound of the refrigerant starting its journey through the system.
The All-Important Waiting Game
Here’s where a bit of patience really pays off. You need to let the fridge freezer get down to its target temperature before you put anything inside. If you load it up straight away, the compressor has to go into overdrive, putting unnecessary strain on the brand-new components and wasting energy.
Most manufacturers will tell you to wait at least four to six hours. This gives the internal temperatures time to stabilise properly, creating the perfect, safe environment for your food. Grab a cuppa, put your feet up, and use this time to actually read the instruction manual – you might learn a thing or two about the different settings.
Setting the Temperature and Final Tweaks
Once the waiting period is up, it's time to get everything dialled in and double-check your handiwork. These final tests will confirm everything is operating exactly as it should.
- Dial in the temperature: Check your manual for the recommended settings, but a great starting point is usually 4°C for the fridge and a frosty -18°C for the freezer.
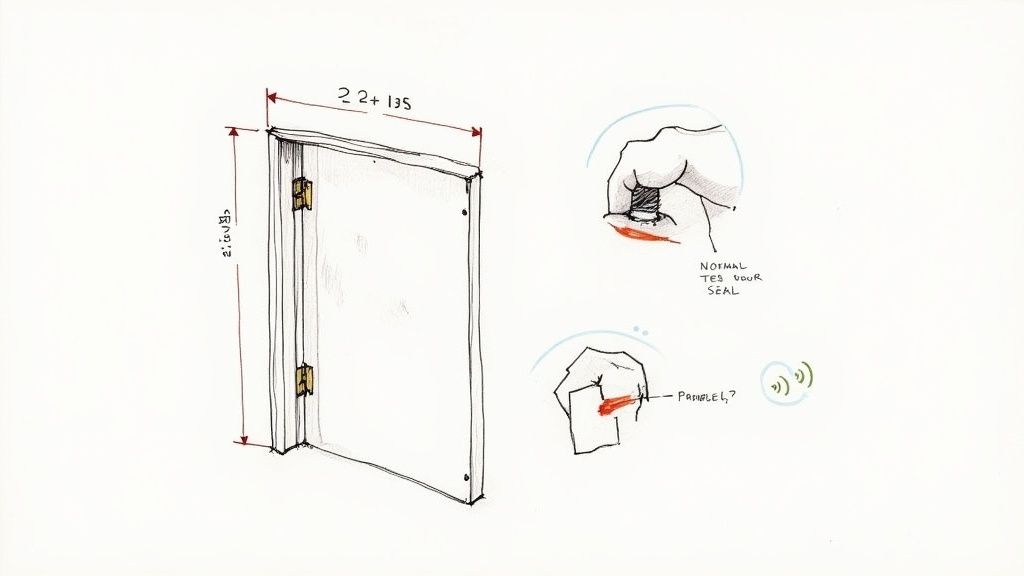
- Test the door seals: A good seal is key to efficiency. Try the classic banknote test: close the door on a banknote and try to pull it out. If it slides out with no resistance, the seal isn't tight enough. You might need to make a tiny adjustment to the levelling feet to sort this out.
- Give the doors a final once-over: Open and close the cabinet doors a few times. Make sure they move freely without catching on anything and that the gaps around them are still perfectly even. Now is the time for any last-minute hinge adjustments.
Getting these final checks right is what makes all the difference. It ensures your new appliance, a key part of a UK market that reached around USD 1.1 billion in 2024, performs at its best. The rising popularity of these built-in units, often part of bigger kitchen refurbs, shows just how much we value that clean, seamless look. You can find more data on this trend over at IndexBox.
By taking the time to follow these commissioning steps, you’re not just finishing a job. You're giving your integrated fridge freezer the best possible start to a long, efficient life, perfectly hidden behind your kitchen doors.
Solving Common Installation Problems
Even the most carefully planned installation can hit a snag. When you're fitting an integrated fridge freezer, a few common issues can pop up, but don't worry—most are surprisingly easy to sort out yourself. Before you pick up the phone to call for backup, let's walk through the most frequent culprits and how to fix them.
One of the biggest frustrations is getting the cabinet doors perfectly aligned. You've done all the heavy lifting, only to find the door is sitting slightly askew, leaving wonky gaps. This almost always comes down to the hinges.
Don't sweat it; these hinges are built for fine-tuning. Take a close look at the hinge mechanism and you'll spot a few small adjustment screws. They usually control three different movements:
- Up and down: This adjusts the door's overall height.
- Left and right: Use this to get the gaps on either side perfectly even.
- In and out: This helps the door sit flush with the surrounding cabinetry.
The trick is to make tiny, quarter-turn adjustments at a time. Tweak one screw, close the door to check the result, and repeat. It’s a bit of a patient process, but it’s the secret to that flawless, professionally-fitted look.
Troubleshooting Door and Noise Issues
What if the appliance door itself swings open or won't seal properly? This is a classic sign that the appliance isn't level. If the unit is tilting forward even slightly, gravity will pull the door open and prevent a tight seal. Grab your spirit level again and check it from front-to-back and side-to-side, adjusting the feet until it's perfectly upright.
Another common worry is an unusual noise once you switch it on. A quiet, steady hum is just the compressor doing its job, and you might hear the odd gurgle or click as the refrigerant moves around. That's all normal. A loud, rattling buzz, however, suggests something is vibrating.
Quick Fix: Before you panic, try gently pulling the unit forward a few millimetres. Often, the rattling is just the appliance vibrating against the back wall or a neighbouring cabinet. Creating that tiny bit of extra clearance is often all it takes to silence it.
Lastly, if the door seal just won't make a solid connection, take a quick peek inside. You'd be surprised how often a rogue vegetable drawer that isn't pushed all the way back or a bottle sticking out of the door shelf is the culprit. A quick rearrange is usually all that’s needed to get a perfect seal. These simple checks can solve the vast majority of post-installation headaches.
Knowing When to Call in the Pros
There's a real sense of achievement in fitting your own integrated fridge freezer, but it’s crucial to know when to put the tools down and pick up the phone. Being honest about your own limits can save you from a world of expensive mistakes and potential safety hazards.
My rule of thumb? If the job involves more than simply plugging the appliance into an existing, accessible socket, it’s time to pause and think.
Red Flags: Electrical and Plumbing Work
Anything involving complex electrics is a definite no-go for DIY. If you need a new socket installed, or the only one available is trapped behind the unit, that’s a job for a qualified electrician. It's just not worth the risk.
The same goes for any model with a built-in ice or water dispenser. These need to be plumbed into your mains water supply. Tapping into a water line is a skilled job, and even a tiny, slow leak from a poor connection can cause devastating water damage to your kitchen units and flooring over time.
Cabinetry and Access Problems
Sometimes the problem isn't the appliance, but the space it's meant to fit into. If the kitchen cabinet needs to be made bigger or structurally altered to accommodate the new fridge freezer, you'll need proper carpentry skills to get a secure and professional finish. A wobbly cabinet is the last thing you want.
Don't ever compromise on the safety or the quality of the finish just to save a few quid. A botched job can lead to the appliance not cooling properly, knackered cabinetry, or worse, a serious electrical fire.
For those more complicated installations that might need a bit of carpentry, electrics, and heavy lifting, you might be better off calling in a team that can handle it all. Professional handyman services in Bristol are often a great solution, as they can coordinate all the different tasks to get the job done right, first time.
Frequently Asked Questions
When you're fitting an integrated fridge freezer, a few common questions always pop up. Getting the answers right from the start can save you a world of headaches down the line and ensure your new appliance runs smoothly for years.
What About Ventilation?
This is the big one. Proper airflow is absolutely critical for your fridge freezer's efficiency and lifespan. Think of it this way: the cooling system generates heat, and that heat needs to escape. If it can't, the appliance has to work much harder, which uses more energy and puts a strain on the components.
Most integrated models need a clear air channel running from the floor, up the back, and out over the top of the unit. As a rule of thumb, this means leaving a 50mm (2-inch) gap at the back. You'll also need vents cut into your plinth (kickboard) and at the top of the housing cabinet. Each vent needs to provide at least 200cm² of clear airflow. Cutting corners on ventilation is the number one reason these appliances fail early, so always, always check the manufacturer’s guide for their specific requirements.
Hinges, Settling, and Adjustments
A classic mistake is buying a new fridge freezer without checking the hinge type. It's not a one-size-fits-all situation, unfortunately. Your kitchen cabinets will have either a sliding hinge system (where the cabinet door is attached to a rail on the appliance door) or a fixed hinge system (also called door-on-door, where the cabinet door is mounted directly onto the appliance door). Your new appliance must have the same hinge type. Check what you’ve got before you even think about buying.
Once your new appliance arrives, resist the temptation to plug it in straight away. You need to let it stand upright for at least four hours. During transit, the oils and coolant in the compressor get sloshed around. This waiting period allows everything to settle back where it should be.
Firing up a new fridge freezer too soon is the fastest way to cause serious, and often permanent, damage to the cooling system. Patience is key here; it’s a non-negotiable step for a long and happy appliance life.
Finally, what if your cabinet doors don't line up perfectly after you've fitted them? Don't panic. It’s a common issue. Most hinges are designed for three-way adjustment (up and down, left and right, and in and out). Take a close look at the hinges, find the adjustment screws, and make tiny turns until you get those door gaps spot on.
If the idea of fiddling with hinges and levelling feet sounds like a job you'd rather avoid, the experienced team at SimplyPro Removal & Storage Ltd can handle it for you. They offer professional furniture fitting and handyman services to get the job done right. You can find out more on their official website.