
Moving a fridge isn't just about brute strength. It's a process, and getting it right starts with a few simple but crucial steps: emptying, defrosting, and unplugging the unit at least 24 hours before the move. Once you've done the prep work, the real key is using an appliance dolly, keeping it as upright as you can, and—this is important—letting it settle in its new spot for a few hours before plugging it back in.
Your Essential Pre-Move Fridge Preparation
Honestly, whether your fridge move goes smoothly is decided long before you even touch the appliance. Proper prep isn't just a good idea; it's the most critical part of the whole job. It prevents damage, avoids messy spills, and saves you a world of stress on the day. Rushing this stage is a classic mistake I see all the time, and it often ends badly.
Just think about it: the guts of your fridge are delicate. The coolant and the oil in the compressor need time to settle properly. Any ice left in the freezer is a guaranteed puddle in the back of the van. This is exactly why a little bit of planning goes such a long way.
Starting the Countdown to Moving Day
Getting your fridge ready isn't a last-minute job. To give yourself a fighting chance and avoid any frantic rushing, you'll want to map out the few days leading up to the move. A timeline helps you stay on track and ensures nothing gets missed.
Here’s a simple schedule I recommend to clients:
Your Fridge Moving Timeline
| Time Before Move | Action Required | Why It Matters |
|---|---|---|
| 1-2 weeks | Start eating down the contents. Plan meals around what's in the freezer. | Reduces food waste and lightens the load significantly. |
| 48 hours | Stop buying new perishable food. Give away or dispose of anything you won't use. | The goal is a completely empty fridge by the 24-hour mark. |
| 24 hours | Empty, clean, and unplug the refrigerator. Disconnect the water line. | This is the crucial window for defrosting and letting the oils settle. |
| 12 hours | Check for any remaining ice or water. Place towels down to absorb moisture. | A final check prevents surprise leaks during transit. |
| Moving Day | Secure all internal parts and doors right before moving. | Ensures nothing rattles or swings open while you're carrying it. |
Following a simple plan like this removes all the guesswork and makes the actual moving day far less chaotic.
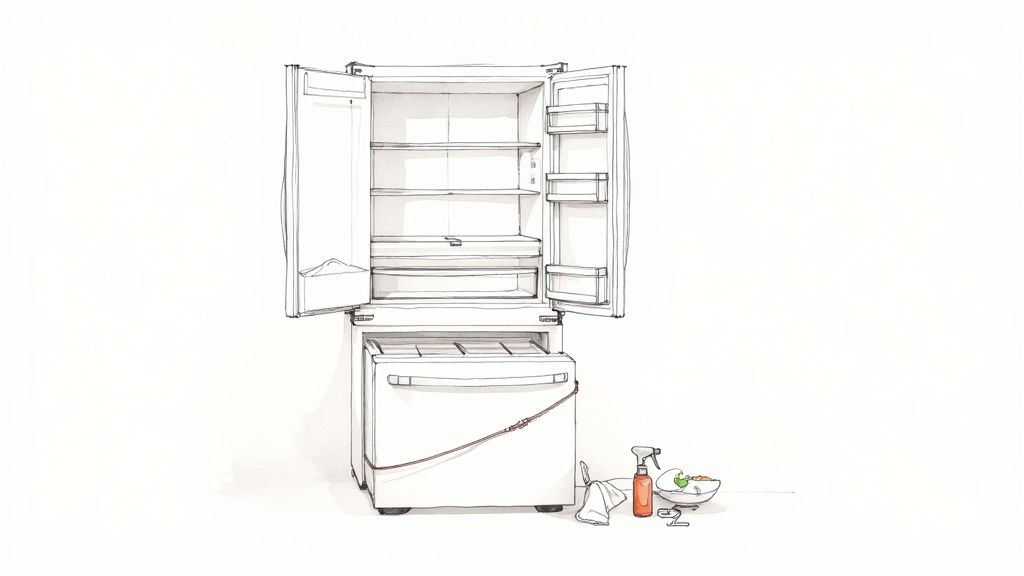
The Defrosting and Disconnecting Process
When it comes to the freezer, defrosting is non-negotiable. Unplug the entire unit at least 24 hours before you plan to move it. This timing is absolutely vital. It gives the freezer enough time to defrost completely and, just as importantly, allows the internal fluids in the compressor to drain back where they belong.
I've seen it happen more than I'd like: improper handling during a move can lead to compressor failure in as many as 15-20% of cases. Giving those internal oils 24 hours to settle is a simple, free insurance policy against a very expensive problem.
To deal with the inevitable water from defrosting, lay some old towels or a couple of shallow baking trays around the base. If you have a fridge with a water dispenser or ice maker, you also have to disconnect the water line. Check your manual for the exact how-to, but it usually just involves turning off the valve behind the fridge and unscrewing the fitting.
Securing Shelves, Drawers, and Doors
Once the inside is clean and totally dry, you need to lock it all down. Take out any glass shelves and the crisper drawers. It's far safer to wrap these up in packing paper or bubble wrap and move them separately.
Next, you have to make sure the doors stay shut. It’s tempting to grab a roll of packing tape, but don't do it—it can strip the finish and leaves a horrible sticky mess behind. A much better approach is to use strong bungee cords or proper moving straps wrapped all the way around the unit. This keeps the doors firmly closed without damaging the seals, a repair that can easily set you back over £100. This is one of those pro tips that DIY movers often overlook, but it makes a huge difference. You can learn more about appliance trends and their impact on moving practices from recent refrigerator market analysis.
With this prep work done, your fridge is clean, dry, and secure. Now you're ready for the heavy lifting.
Gathering the Right Tools for a Safe Fridge Move

Thinking you can move a fridge with sheer willpower and a bit of hope is a recipe for disaster. To get this job done safely, without wrecking your appliance, your back, or your home, you absolutely need the right equipment. This isn't about being overcautious; it's about being properly prepared for a genuinely tricky task.
Having the correct gear transforms a risky operation into something manageable. It protects your back, the fridge’s delicate cooling system, and your floors and walls from those awful scuffs and dents. Honestly, think of these tools as non-negotiable.
The Heavy Lifters: Dolly and Straps
First on the list is a proper appliance dolly—what we often call a sack truck here in the UK. I can't stress this enough: it's not the same as those little flat furniture dollies. A real appliance dolly stands upright, has straps built-in, and often features clever stair-climber wheels to help with steps.
You’ll want to find a model rated to handle at least 300kg. Your fridge might not be that heavy, but the extra capacity gives you the stability you need for those bulky, top-heavy fridge-freezers. The dolly takes the weight, leaving you to focus on steering the appliance safely.
Working hand-in-hand with the dolly are securing straps. Ratchet straps or sturdy moving straps are vital for locking the fridge tightly to the dolly. This stops it from shifting, tilting, or worse, toppling over when you're navigating a tight corner or uneven ground. I always recommend using two straps for maximum security.
Essential Protection and Support Gear
Scratches and dents are the most common casualties when moving a fridge. A few simple items will keep your appliance looking pristine.
- Moving Blankets: These thick, padded blankets are your best friend. Wrap the entire fridge in one or two before you even think about strapping it up. This protects the finish from the straps themselves and cushions it against any accidental bumps.
- Bubble Wrap or Cardboard: For a bit of extra peace of mind, especially around protruding handles or sharp corners, some bubble wrap or flattened cardboard can add another welcome layer of cushioning.
- Furniture Sliders: These little discs are incredibly handy if you need to slide the fridge across the room just to get it into position for the dolly. Placing sliders under the fridge's feet can slash friction by up to 70% on carpets, making that initial shuffle so much easier.
UK health and safety guidelines are clear on team lifting for heavy items, and for good reason—a staggering 1.2 million workdays are lost each year to lifting-related injuries. A proper two-person team, where one guides and one pushes, can cut the risk of back strain by 50%.
The Finishing Touches: Toolkit and Safety Items
Lastly, a few smaller bits and bobs will complete your kit and make sure you're ready for anything. A basic toolkit with a few screwdrivers and a wrench is a must for disconnecting water lines or, if you’re really tight on space, removing the doors.
And please, don't forget your own safety. A good pair of work gloves with a solid grip is crucial for handling the dolly and straps without slipping. Your control over a few hundred kilograms of metal can be seriously compromised without them.
Gathering all these essential packing materials for moving beforehand will make the whole process go smoothly. These items are fundamental to a successful move, preventing injuries and protecting your property.
Measuring Up and Planning Your Escape Route
Here's where a little prep work saves a world of pain. I've seen it happen countless times: the fridge is empty, the dolly's waiting, but the appliance gets jammed in a doorway. The real challenge isn't just the weight; it's the sheer awkwardness of the thing. Trying to force a fridge through a gap that’s too small is a recipe for scratched paint, damaged walls, and a whole lot of frustration.
Think of yourself as a strategist. By measuring every inch of the fridge and its path out the door, you're turning a potential disaster into a smooth, predictable operation.
Getting Your Fridge’s Dimensions
First things first, you need to know exactly what you’re working with. Grab a tape measure and get the three critical stats for your fridge.
- Height: Measure from the floor right to the very top. Don't forget those little hinge covers on the doors—they can be the bit that catches you out.
- Width: Go from side to side at the widest point. This is usually the main body, not the doors.
- Depth: Measure from the front of the appliance to the coils at the back. Crucially, make sure you include any handles that stick out.
Scribble these numbers down. Everything on your exit path—every door, every hallway—needs to be bigger than these figures. No exceptions.
Charting a Course to the Van
With your fridge's dimensions handy, it's time to walk the route. Start in the kitchen and trace the exact path you'll take to the moving van, measuring every single opening along the way.
Pay close attention to the tightest spots. In many UK homes, this is often a narrow kitchen doorway, a tight turn in a hallway, or the landing at the bottom of the stairs. If a doorway is narrower than your fridge’s width, you’ve got a problem to solve.
Mapping out potential obstacles like this is a fundamental part of any move. It's why any good moving house checklist will tell you to plan your routes for large items well in advance.
Tackling Common Bottlenecks
So, what happens when the measurements just don’t work? A few centimetres can feel like a mile, but there are usually ways around it.
- The Doorway Squeeze: If a doorway is just a fraction too snug, the easiest fix is to take the house door off its hinges. This simple trick can gain you an extra 5-7 centimetres of clearance, which is often all you need.
- The Hallway Pivot: When you hit a tight corner, it's all about the angle. Tilting the fridge back on the dolly can sometimes help the top or bottom edge clear the wall first, allowing you to swing it around.
- The Staircase Challenge: Stairs are a different beast altogether. Measure the ceiling height at the bottom and top of the flight. A low ceiling on a landing is a classic trap that can stop a move dead in its tracks.
Here’s a pro tip that has saved me more times than I can count: take the fridge doors off. It sounds like a hassle, but it can reduce the appliance’s depth by 10-15 centimetres. That’s often more than enough to breeze through a tight spot. Just be sure to bag and label the screws so you can find them later!
Removing the doors is also something you'll do when fitting a fridge into a new kitchen. Whether it's a small shuffle or a full-blown renovation, knowing how to plan a kitchen remodel can help you think ahead, ensuring your fridge not only arrives safely but also fits perfectly into its new home.
Mastering the Safe Lifting and Moving Technique
Alright, your fridge is empty, defrosted, and the path is clear. This is where the real work begins. Moving a fridge isn't about brute strength; it's about smart technique, clear communication, and using your tools properly. Get this right, and you'll have a smooth, damage-free move. Get it wrong, and you’re looking at a stressful, potentially expensive mistake.
This is the hands-on bit. With the right approach, you can tackle it confidently and keep your appliance, your home, and yourselves safe from harm.
The whole process boils down to a few key moments: getting the fridge onto the dolly, navigating your home, and handling any tricky spots along the way. The diagram below gives you a simple visual of this plan.
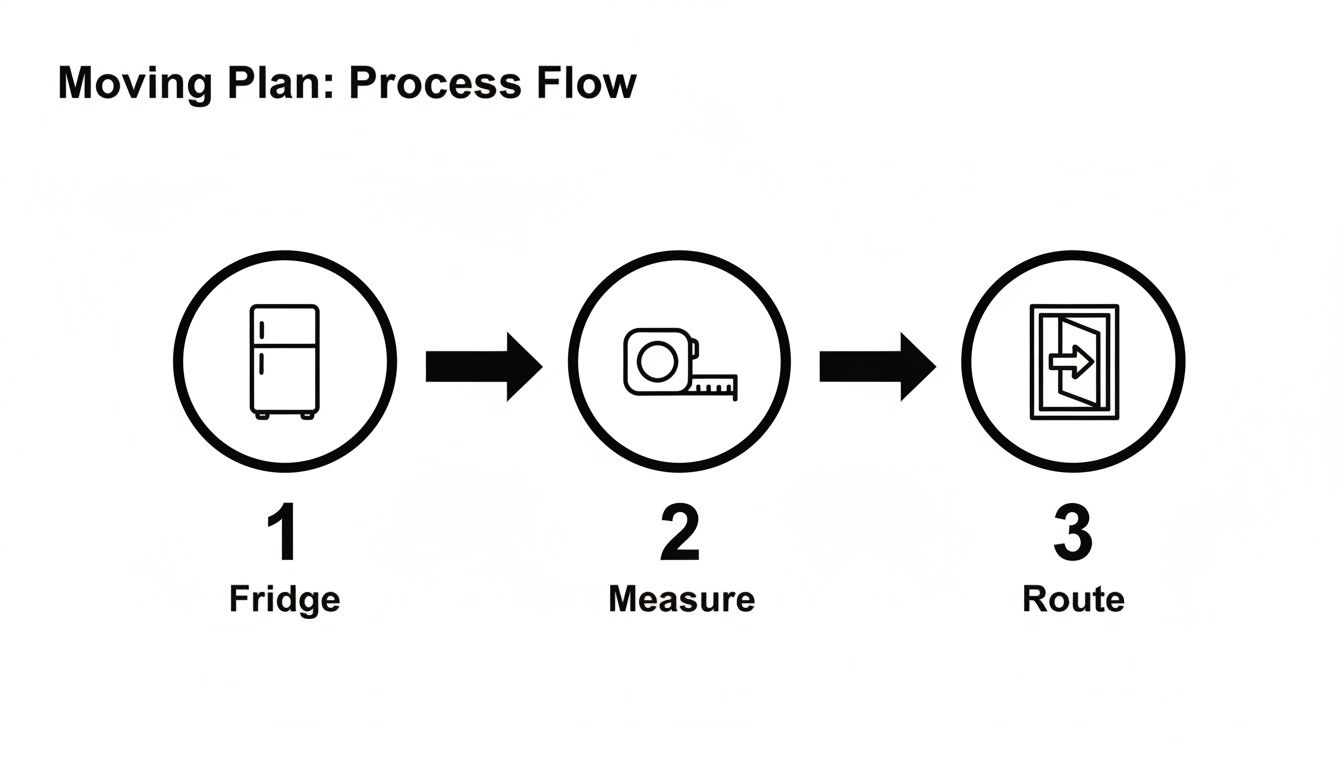
This just reinforces the importance of a solid plan: know your appliance, know your measurements, and know your route.
Positioning the Dolly and Securing the Fridge
Your appliance dolly (or sack truck) is your best friend for this job. First, ease the fridge away from the wall just enough to get the dolly in position. I find it’s usually easier to place the dolly on the side of the fridge rather than the back – it gives you a wider and much more stable base to work with.
Next, have your helper carefully tilt the fridge forward just a few inches. This gives you the space to slide the dolly's base plate completely underneath. Once it's centred, let the fridge rest back against the dolly's frame.
Now, it's time to strap it in. Use at least two good-quality ratchet straps. I recommend one around the top third and another around the bottom third of the fridge. Loop them through the dolly's frame and around the appliance, then crank the ratchet until they are rock-solid. Give it a gentle push; the fridge and dolly should feel like one single unit, with absolutely no wobble.
The Art of the Tilt and Two-Person Teamwork
This part is absolutely critical. When you tilt the dolly back to get the fridge onto its wheels, you must never tilt it more than 45 degrees. Modern fridges have incredibly sensitive sealed systems, and if you tilt them too far, the compressor oil can run into the cooling lines. That’s a recipe for permanent damage.
With so many smart appliances on the market, proper handling is more crucial than ever. Industry repair data suggests that tilting a fridge beyond 45 degrees can damage the sealed systems in up to 30% of cases. Meanwhile, ONS figures show a worrying spike in injuries from improper lifting. Using a transit dolly with ratchet straps is a game-changer—it distributes the load and can slash the risk of muscle tears by as much as 55%.
This is always a two-person job. Make sure you know your roles before you start:
- Person One (The Pusher): This person is behind the dolly, holding the handles. They provide the forward momentum and control the angle of the tilt.
- Person Two (The Guide): This person walks backwards in front of the fridge. Their job is to spot obstacles, call out turns, and help lift the dolly over bumps like door thresholds.
Communication is everything. Keep it simple and clear: "Stop," "little bit to your left," "okay, lifting over the doorway now." This constant back-and-forth prevents accidents and keeps the entire move under control.
Navigating Stairs and Tight Corners
Stairs are the final boss of moving a fridge. The secret is to go slow and tackle them one step at a time. The pusher controls the movement, while the guide at the bottom provides stability and bears a significant part of the weight. The person at the bottom of the stairs has the tougher job, ensuring the dolly’s wheels land securely on each step without losing control.
When you hit a tight corner, slow right down. The guide needs to be watching both the top and bottom corners of the fridge to make sure you clear the walls without scuffs. Sometimes, a tiny adjustment to the tilt is all you need to pivot smoothly. This is where all that measuring you did earlier really pays off.
These principles of careful planning and teamwork apply to moving any large, awkward item. For example, if you're facing another tough challenge, our guide on how to move a piano offers specialist advice. Tackling a delicate instrument like that requires a similar level of precision and care, a mindset that serves you just as well when moving a fridge.
Before we move on, let's look at a few common pitfalls. Having been in the business for years, I've seen the same small mistakes cause big problems time and again. Here’s a quick table to help you avoid them.
Common Moving Mistakes and How to Avoid Them
| The Mistake | The Potential Consequence | How to Get It Right |
|---|---|---|
| Forgetting to Secure the Doors | Doors swinging open can cause damage to the fridge, walls, or even injure someone. | Use bungee cords or strong tape to keep the doors firmly shut during the move. |
| Tilting the Fridge Too Far | Compressor oil can enter the cooling lines, leading to permanent, costly damage. | Never tilt the fridge more than 45 degrees. Keep it as upright as possible at all times. |
| "Muscling It" Without a Dolly | High risk of back injury, dropping the appliance, and damaging your floors. | Always use an appliance dolly with straps. It’s the right tool for the job. |
| Not Measuring the Route First | Getting stuck in a doorway or hallway, forcing you to backtrack and risk damage. | Measure the fridge and all doorways, stairs, and tight corners before you start. |
| Plugging It In Too Soon | The refrigerant and oil need time to settle. Turning it on immediately can damage the compressor. | After moving, let the fridge stand upright in its new spot for at least 4 hours before plugging it in. |
Avoiding these simple errors is often the difference between a successful move and a moving day disaster. A little bit of extra care goes a long way.
Getting Your Fridge Settled in Its New Home
You’ve wrestled it through doorways, navigated the stairs, and survived the moving van. Getting your fridge into its new kitchen feels like you’re on the home stretch, but don't get ahead of yourself. Plugging it in too soon is a classic, costly mistake that can destroy the compressor for good.
This final part of the job is all about one thing: patience. After all the jostling and tilting of a move, the oil and coolant inside your fridge are sloshing around. They need time to settle back where they belong. Rushing this can lead to total mechanical failure, turning your successful move into a very expensive problem.
The All-Important Waiting Game
The golden rule after moving a fridge is to let it stand upright for a while before you even think about plugging it in. How long you need to wait depends entirely on how it travelled.
-
If it stayed upright: If you were one of the lucky ones and kept the fridge vertical for the whole trip, a 2-4 hour wait should do the trick. This just gives everything a chance to resettle from the vibrations of the journey.
-
If it was tilted: This is what happens most of the time. If your fridge was tipped at any point—even just to get it onto the dolly—you absolutely must wait a minimum of 4 hours. I always tell people to let it sit for as long as it was tilted, but four hours is the bare minimum.
-
If it was laid on its side: Look, it’s not ideal, but sometimes you have no other choice. If your fridge had to be transported on its side, you’re looking at a wait of up to 24 hours before plugging it in. That sounds like a long time, but it’s essential for giving the compressor oil, which has likely seeped into the cooling lines, time to fully drain back.
Why the wait? Plugging in a fridge before the oil has settled can cause a blockage in the cooling system. This forces the compressor to work against incredible pressure, often leading it to burn out permanently. A bit of patience now can save you a massive repair bill later.
Positioning for Performance
Before you start the clock on that waiting period, get the fridge into its final position. You'll want to leave a bit of breathing room around it for proper ventilation. Check your manual if you have it, but about an inch on the sides and at the back is a good general rule. This stops the compressor from overheating as it works to get rid of heat.
Grab a spirit level to make sure the fridge is sitting perfectly flat. Most models have adjustable feet you can twist to sort out any wobbles. A level fridge isn’t just about aesthetics; it ensures the doors seal properly and all the internal fluids sit right. While you're getting it placed, it's a good time to think about the timeless principles of the kitchen work triangle to make sure your new layout is as efficient as possible.
Powering Up and Cooling Down
Once you’ve patiently waited the required time, the rest is pretty straightforward.
- Get Connected: If you have an ice maker or water dispenser, carefully reconnect the water line. Give the connection a quick check for any drips before you push the fridge all the way back into place.
- Plug It In: Plug the power cord directly into a grounded wall socket. I'd strongly advise against using an extension cord, as they often aren't rated to handle the power a fridge pulls.
- Set the Temp: Turn the fridge on and set the thermostat to a middle-of-the-road temperature. Don’t just crank it to the coldest setting right away.
- Wait… Again: Here comes the final test of your patience. You need to wait for the fridge to get down to its target temperature before you start loading it with food. This can take anywhere from 6 to 24 hours.
Shoving a load of room-temperature food inside forces the compressor to work overtime and actually slows down the whole cooling process. Once it’s properly chilled, you can finally restock your shelves, knowing the job is done right.
Your Fridge Moving Questions, Answered
Even with the best plan, moving something as big and fragile as a fridge can throw up a few curveballs. It’s natural to have questions pop into your head as moving day gets closer.
Getting some clear answers now will help you tackle the job with confidence. Here are the most common things people ask us, along with our straightforward advice.
Can I Lay My Fridge Down to Transport It?
This is a big one, and the short answer is: try everything you can to avoid it. The only way to be completely sure you won't damage your fridge is to keep it upright, or at a slight tilt of no more than 45 degrees on a dolly.
Here's the problem: when you lay a fridge flat, oil from the compressor can leak into the cooling lines. If you turn it on before that oil has drained back, you can create a permanent blockage and completely wreck the compressor. Keeping it vertical is your best insurance against a very costly repair bill.
How Long Before I Can Plug My Fridge In Again?
Once you’ve got the fridge in its new home, you need to be patient. How long you wait really depends on how it made the journey.
Here’s a simple guide:
- If it stayed perfectly upright: You’ll likely be fine after just 1-2 hours. This is just to let the fluids settle from the jostling of the move.
- If it was tilted (which is most common): Give it a solid 4 hours, minimum. This is the magic number to ensure the compressor oil has had time to flow back where it belongs.
- If you had to lay it flat: If there was absolutely no other way, you need to play it extra safe. Wait for up to 24 hours before even thinking about plugging it in. This gives the oil the maximum time to drain back into the compressor.
Should I Just Hire Professional Movers for This?
A DIY fridge move is definitely doable if you have the right gear and a capable friend. But honestly, hiring professionals is often the smarter, safer bet. It really comes down to your situation and how comfortable you feel with the risk.
You should seriously consider calling in the pros if you're dealing with multiple flights of stairs, really awkward corners, or if you simply don’t have a reliable helper. It's not just that they have the heavy-duty equipment; it's that they have insurance. That insurance covers any damage to your fridge and your property.
Think about it – a modern American-style fridge-freezer can easily top 150kg. Trying to wrestle that down a narrow staircase is a job for people who do it every day.
What are These Strange Noises After I Plugged It In?
When you first power up the fridge, expect to hear some gurgling, humming, and maybe a few clicks. Don't panic! This is usually just the refrigerant and oil starting to circulate again as the system kicks into gear to get cold.
What you need to listen out for are loud or non-stop noises. If you hear a really aggressive buzzing, a constant clicking that won't stop, or a grinding sound, unplug it straight away. These could signal a compressor issue that happened during the move. Let it sit for a few more hours and try again. If the noise is still there, it's time to call an appliance technician to take a look before the problem gets any worse.
Moving a fridge can be a real headache. If you're not confident about doing it yourself, especially with a tricky layout or an expensive appliance, let the experts take the weight off your shoulders. For a safe, insured, and stress-free move in Bristol, Bath, and the surrounding areas, contact SimplyPro Removal & Storage Ltd. Get your fast, no-obligation quote today!